The court your customer designed, as a document you can build from
Every design exports a spec pack: setting-out drawings against a datum, the tile grid with every cut marked, the packs to order and the order to lay them in, the federation check and the sign-off block.
Not a picture of a PDF. The PDF.
The product generated this file from a multi-sport court somebody drew in the designer, and it went into the repository unedited. Nothing was tidied up for the website. Open it and check the arithmetic: the tile schedule on the cover is the count the price was worked out from, and the sheets below are pages of that same file rather than mock-ups of it.
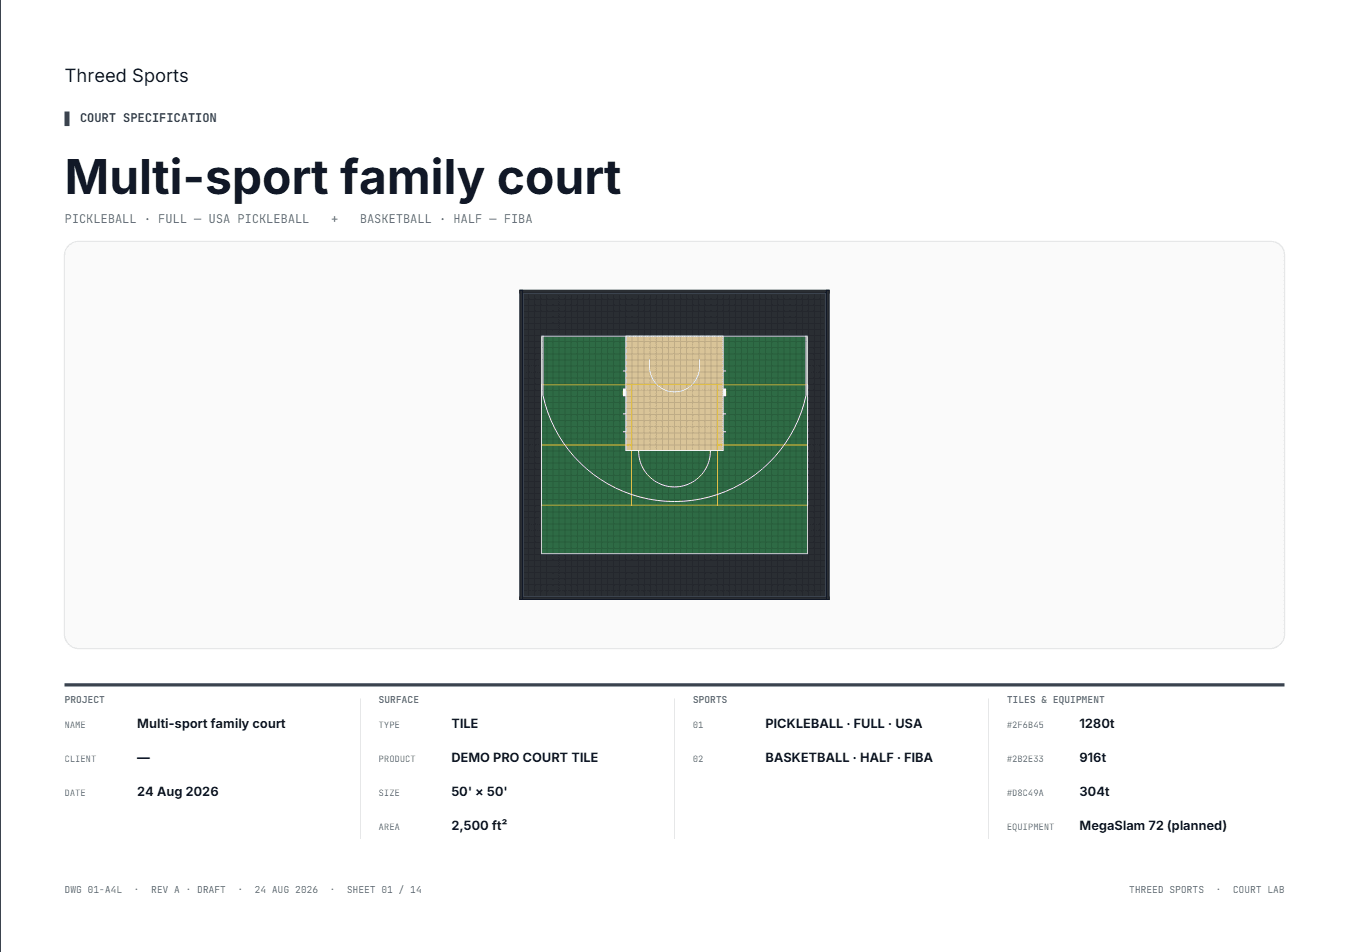
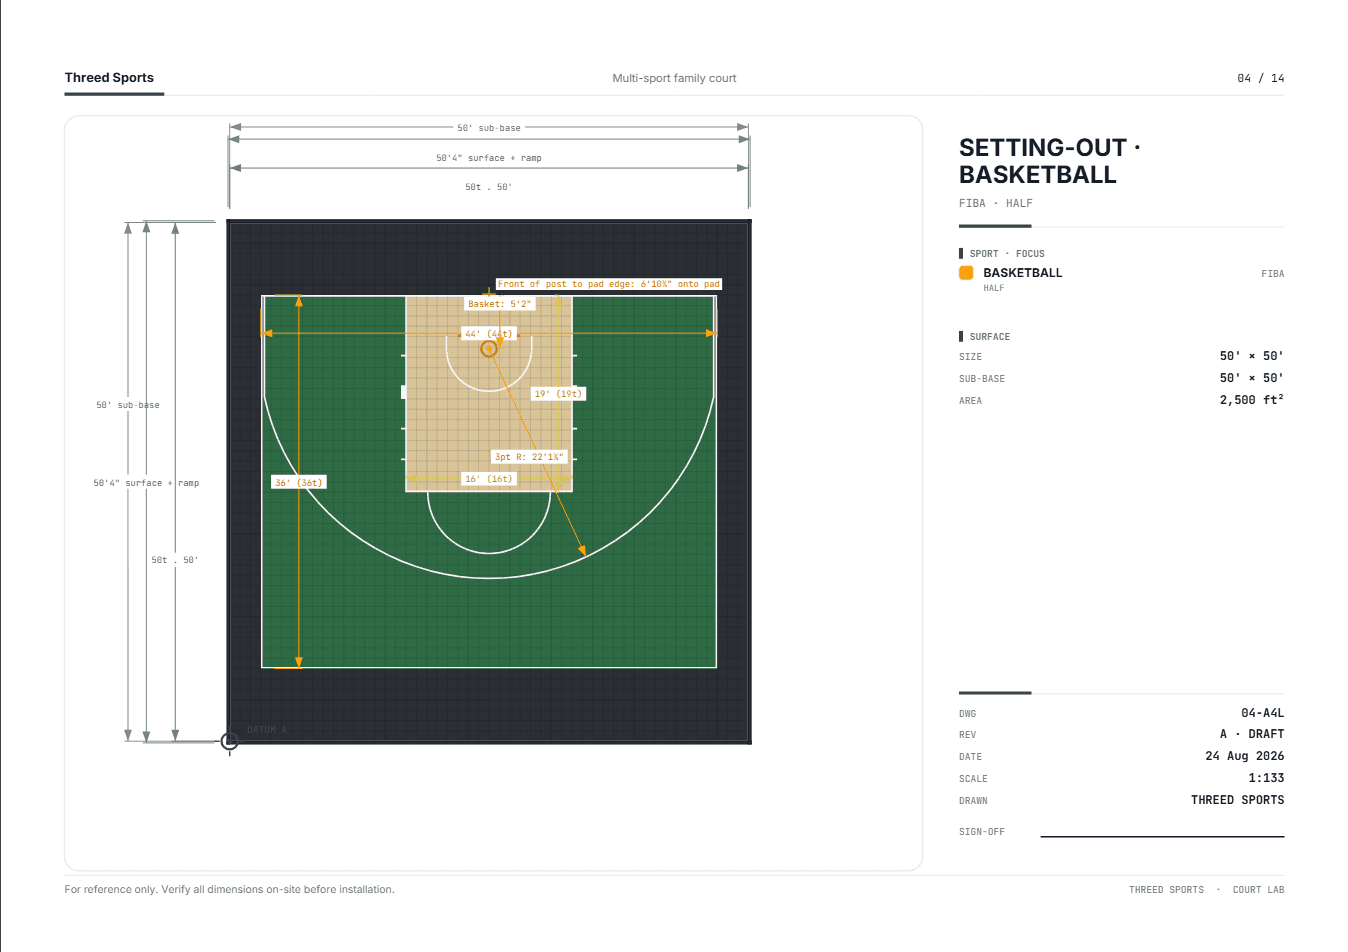
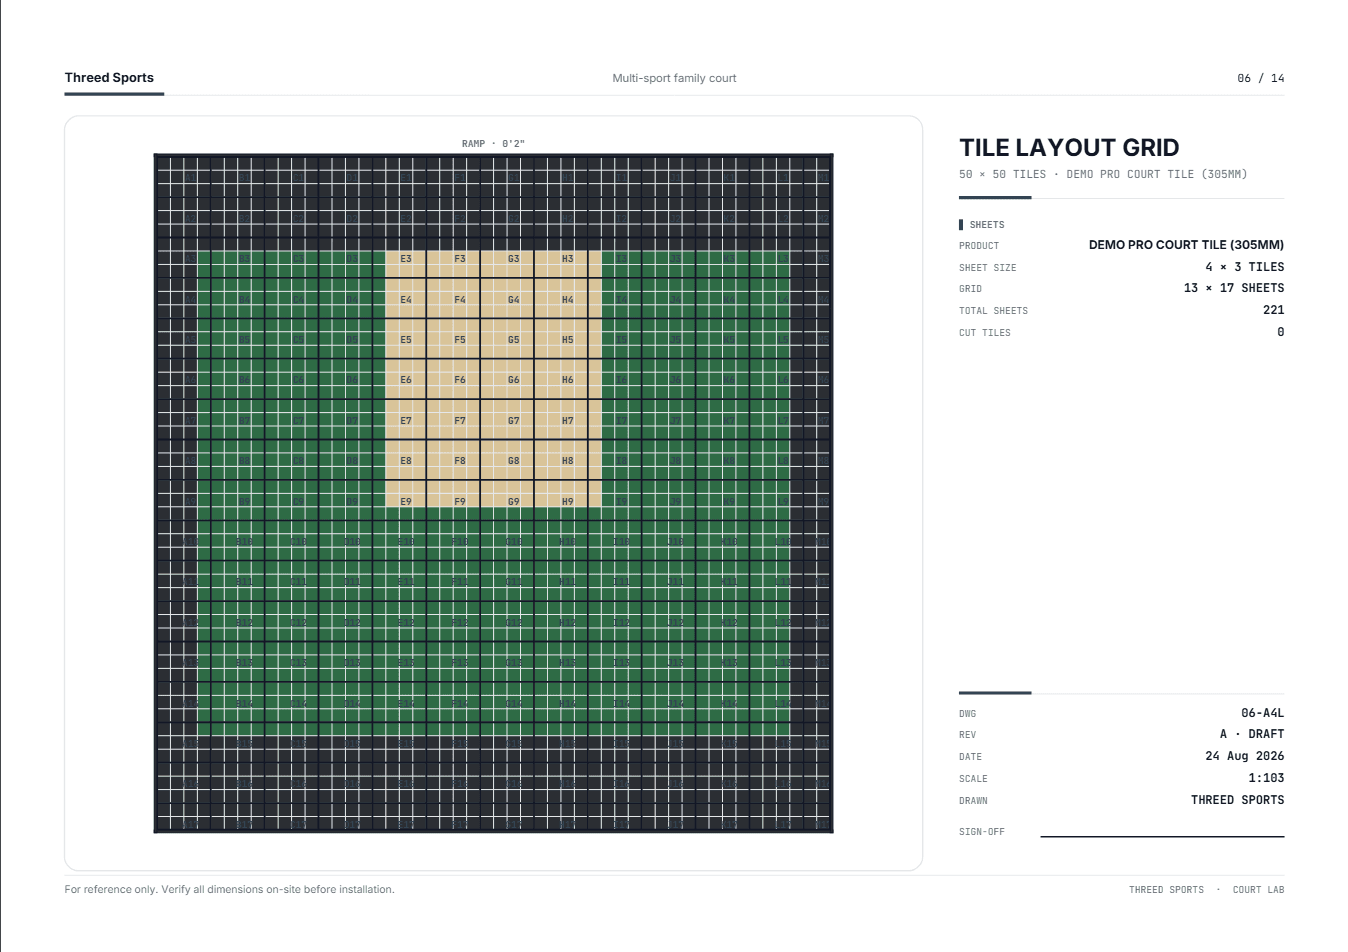
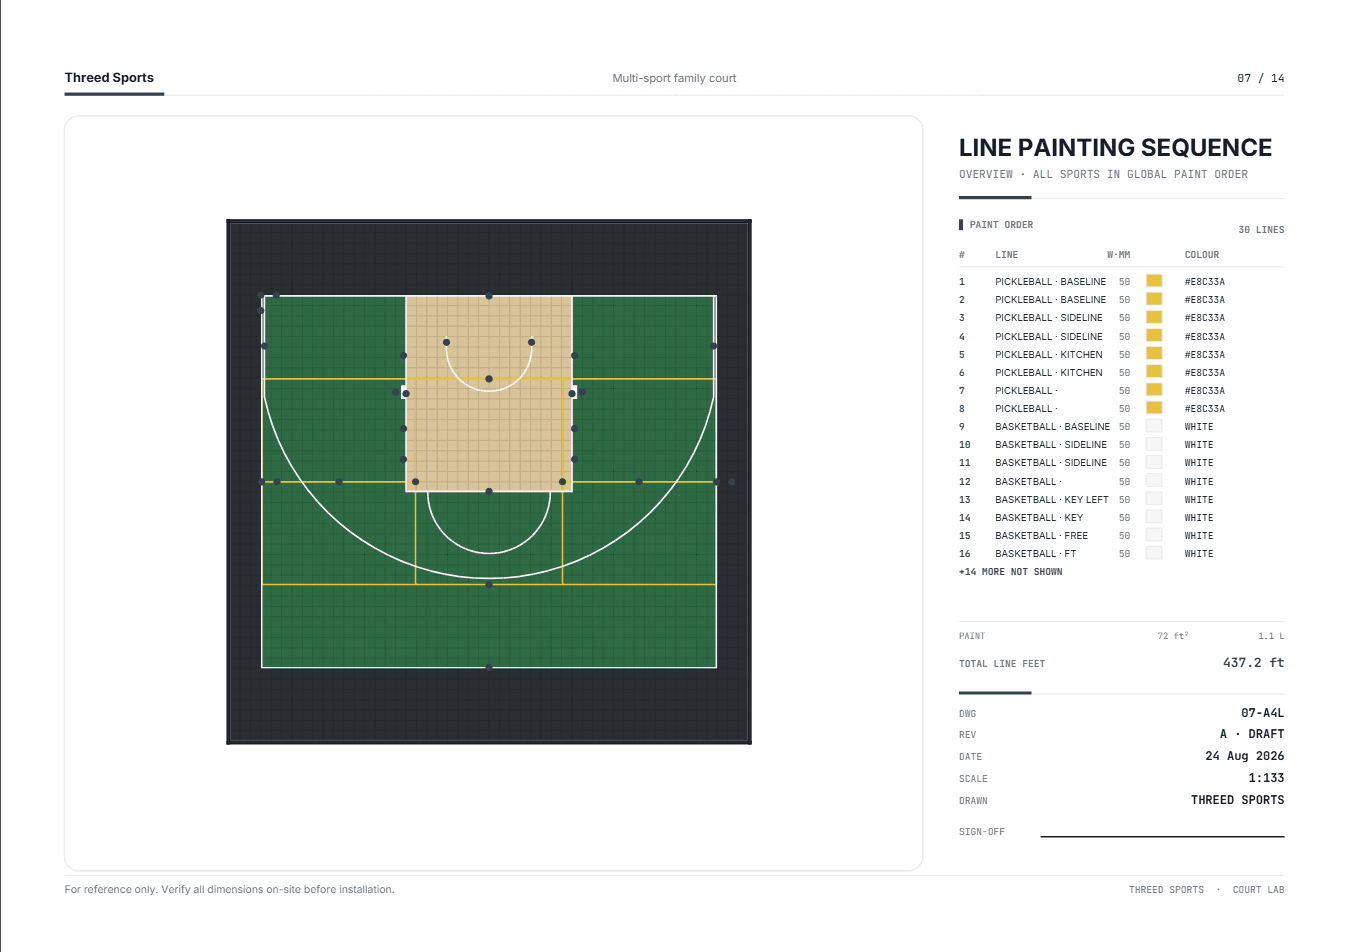
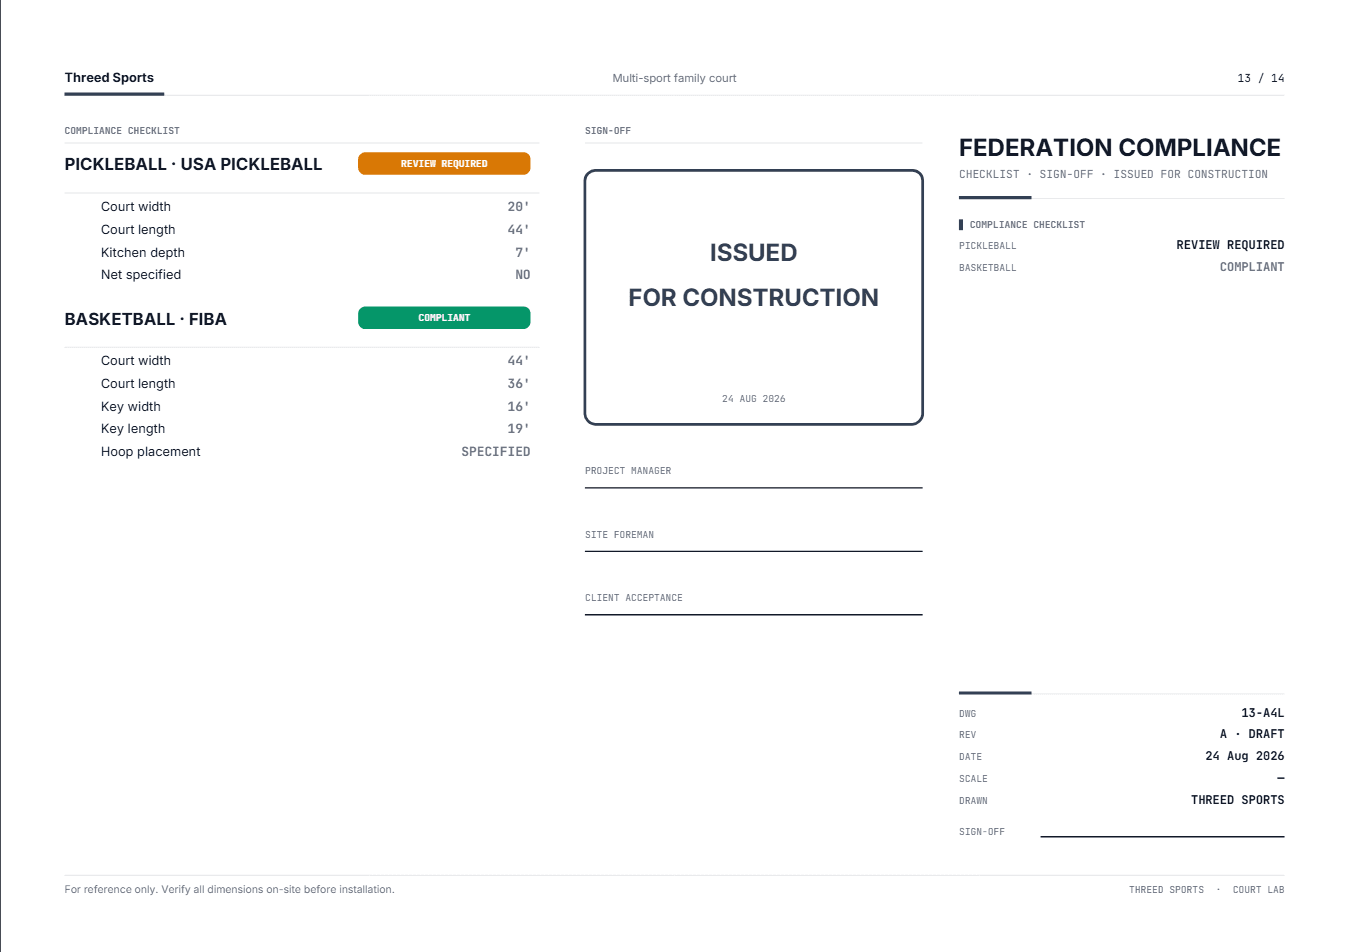
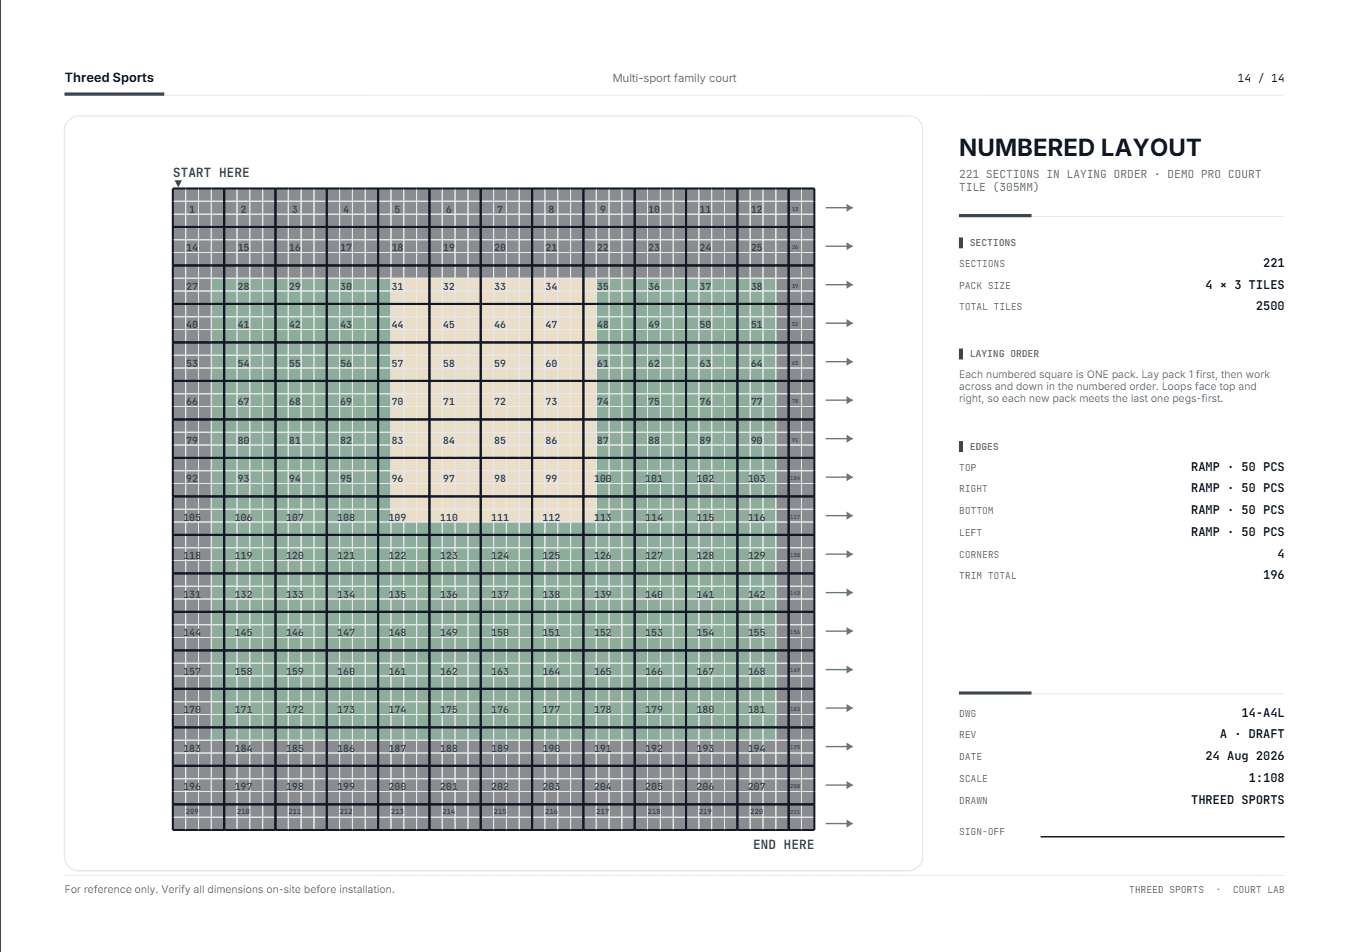
Every page in the pack, and what each one is for.
14 pages, drawn from 10 of the 12 sheet types the generator knows. The two it left out are the putting-green pack and the logo layout, and both are correct: a court has no topo plan, and this design carries no decals. Setting out and line painting then repeat per sport, so the painter marking the pickleball lines is not reading the basketball ones off the same drawing.
- 01Title + SpecificationThe cover. Project, surface, sports, tile and equipment schedule, and the hero render.
- 02Setting-out PlanEvery court on the floor at once, dimensioned against a datum corner.
- 03Setting-out · PICKLEBALLThe same floor with only the pickleball court dimensioned. Equipment stays drawn for context.
- 04Setting-out · BASKETBALLBasketball on its own, including the hoop anchor dimensions.
- 05Colour ZonesWhat the customer is buying: the surface by tile colour, with a tile count per zone and no court lines to read past.
- 06Tile Layout GridThe installer working sheet. Numbered cells, the cut tiles marked, the edging band round the outside.
- 07Line Painting SequenceEvery line across every sport, numbered in the order it gets painted, with widths, colours, total line length and paint volume.
- 08Line Painting · PICKLEBALLPickleball lines only, renumbered in their own sequence.
- 09Line Painting · BASKETBALLBasketball lines only, renumbered the same way, so neither sheet has to be read past the other.
- 10Sub-base & DrainageFalls in plan, the build-up in section, and a perimeter detail through the surface edge.
- 11EquipmentHoops, nets and goals with part numbers, mount type and the anchor size to dig for.
- 12Bill of MaterialsTiles by colour with a wastage allowance, the packs to order, and which of them arrive short.
- 13Federation ComplianceEach sport checked against its governing body, with the sign-off lines and the issued-for-construction stamp.
- 14Numbered LayoutThe order the floor goes down in: one number per pack, start and end marked, edging counted per side.
Draw the real room and the order falls out of it.
The outline is prescriptive. A measured hall is whatever width it is, whether or not that divides by the tile pitch, so the tiles absorb the mismatch by being cut and the room never gets snapped to suit them. Below is that rule running, one step further along than the cut map on the home page, which stops at the tile count.
The second control changes more than it looks like it should. Nobody picks the edging: what decides it is what lies beyond the boundary, because a cut tile has had its pegs severed and nothing can clip to it.
Every edge is a wall, so the field runs to the line and the boundary tiles get cut. A cut tile has no pegs left, so nothing can be clipped to it: the cut face is the finish, and the wall hides it.
Nobody picked any of that. The tiles come from classifyTiles() and the edging from deriveRamps(), both reading the same outline the 3D scene, the price and the pack read. Edging is drawn at the tile range's real 50 mm, so on a room this size it is a fringe rather than a band.
Tiles
- Whole tiles
- 650
- Tiles cut on siteCharged as whole tiles. You buy one off the pallet and cut it.
- 56
- Tiles under the pillarCovered entirely, so never bought.
- 4
- Tiles to order65.6 m² charged, before the wastage allowance the pack adds
- 706
Edging
- Side piecesEdges running along the room depth. Pegs on that axis, so this is the male part.
- 0
- End piecesEdges running along the room width, so the opposite part.
- 0
- Corner mouldings
- 0
- Mitred junctionsInside corners. No part exists; the fitter cuts the two runs into each other.
- 0
- Cut facesReported even though no part can attach, because the installer still meets the edge.
- 59
- Faces around the pillarCounted and left alone. Whether a pillar gets trimmed is an open question, not a silent yes.
- 8
One function decides it, so the drawing and the invoice cannot disagree.
Precision is easy to claim and hard to keep, and the way it usually breaks is not a wrong formula. It is two of them: the renderer counting one way and the quote counting another, each correct on its own terms.
One classifier, five consumers
classifyTiles() answers whole, cut, void or excluded for every cell, and it is the only input to the 3D scene, the bill of materials, the price and the pack's cut map. The range pages became the fifth consumer after one of them advertised more floor than the quote beneath it billed for.
The arithmetic is pinned by name
lib/court-lab/__tests__/pricing.test.ts holds the stock L-shaped room at 384 charged tiles against the 480 its bounding rectangle would have billed. That gap is the over-quote the rule exists to stop, and it is named in a test rather than trusted to memory.
The edge rule generalises the old one
lib/court-lab/__tests__/perEdgeTileFit.test.ts asserts that treating every edge as a wall is exactly what the old whole-surface code did, and that treating every edge as open matches the other half of it. A saved design cannot move by a tile when the finer rule arrives.
A roll plan is not a cut map, and a green is neither.
The pack above is a tile pack, so it carries a tile grid. The same generator draws the other two families from their own geometry rather than relabelling the tile sheets, which is why the sheet set changes with the surface.
Tile: the cut map
Numbered cells across the floor, the cuts marked, the edging counted per side, and a laying order that starts at one pack and ends at another. Page 6 and page 14 of the pack above.
Turf: the roll plan
The same working sheet adapted to the material: vertical strips at the roll width, lettered in laying order, with the last strip flagged when it is a cut. Turf is bought by the roll, so a grid of tile cells would be the wrong drawing.
Putting green: the topo pack
Two pages of its own. A topo plan with contours every 50 mm and a heavier one every 150 mm, spot heights on the control points and cups, datum and north arrow; then falls and base. That page carries the steepest grade on the green, how much of the surface sits above the puttable limit, the green speed, the area and the base build-up.
A green also leaves as a machining file.
A contoured green is shaped, not laid, so a drawing is not the end of it. The same solved height grid the printed plan is drawn from feeds three exports, which is what stops the contour interval on paper differing from the one in the CAD file. A customer reaches them in the designer once they sign in to save a design, and a provider from the dashboard editor.
STL, for CNC and 3D print
Binary mesh of the green surface in millimetres, for Fusion 360, Mastercam or a slicer. Optionally closed with a base and side walls, which is what a printer needs and a router does not. Scaled down, it prints as a desk model of the green the customer just drew.
DXF, for earthworks
R12 ASCII, so it opens in AutoCAD, BricsCAD, QCAD and Fusion 360 without a converter. Contours sit on a layer per elevation, with the perimeter and the cup positions on their own. A test asserts the sign of the north axis, because a mirrored plan is a green milled backwards.
Height map, for a depth-map controller
A greyscale PNG where mid grey is datum, plus a sidecar text file giving millimetres per pixel and per grey unit. For the simpler controllers, and for anyone who wants the surface as data rather than as geometry.
Want one of these on your own products?
Send us your range and we will build you a working designer on it. The spec pack comes out the other end with your tiles, your dimensions and your title block.